Wednesday, October 28, 2009

Clockeriffic

This past week, despite my having a project I am rather excited about, I have stepped away from my work. I'm instead working on a theatrical set for some friends with a local theater company. Their set was conceptually designed, but due to some complications in scheduling, they suddenly found themselves without anyone confidently artistic to oversee and execute the physical, actual design of it, so I traveled up to help.

The show is a set of short one acts brought together by a common theme of time. Thus, the set shares the theme, and is dominated by endless clocks. About 324 square feet of clocks, actually. Perhaps a little more. These clocks are to decorate the back walls across the stage and the front of the two platforms much action takes place on. They are meant to be metallic-ish, gear-like suggestions of clocks more than actual clocks- no one in the audience should be able to look past the actors and go "hm, it's 3:25 and 7:42 and 12:16!"

What all this means is that my head is chock full of circles these days. When I close my eyes I see this:
OOOOOOOOOOOOOOOOOOOOOOOOOOOOOOOOOOOOOOOOOOOOOOOOOOOOOO

It took one day to paint all of the set materials black as a beginning. The next day and a half or so was spent coating them with a very thin layer of watered down gold paint to soften the black background into one that eventually appeared greenish. It took about three days to draw all of the circles, which range in size from 8" in diameter to 35", with about 6 variations in between. Today I mixed four shades of golden yellows and, with a crew of 3, painted the faces of hundreds of will-be clocks. Tomorrow I'll begin free hand detail work in darkened versions of the paints used today. Here's a handful of the images I'm currently looking at, to gear my mind up for the work tomorrow:


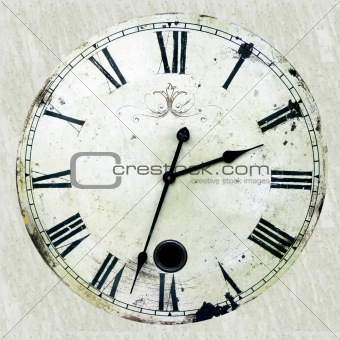
I'll try to get some pictures before the show opens and I leave!

Saturday, October 24, 2009

A frequently used process

Much of my work involves embroidered imagery drawn from photography. I thought I'd begin here with a little tour through a process I often use to turn a photograph into an embroidery pattern, using an older piece as a model.

To begin, I select an image in which the subject is clearly visible, such as this one:


I scan the image, resize as needed, adjust brightness and contrast, and print it out in black and white, like so:


Next I draw over the image, picking out lines and shapes I want to end up in the eventual embroidery pattern:


Once the line drawing is complete, I retrace the image on to the tracing paper I use as my pattern:


And so goes the process:


With the pattern ready, I can adhere it to my chosen cloth and stitch away, perforating the paper with my stitches so that it is easily removed when I am done. This is the finished embroidery of that piece:


It's a bit of a time consuming and labor intensive way to go about turning the image into the pattern, but then, most of my work is time consuming and labor intensive, and I rather enjoy it. I'm a time consuming/labor intensive appreciative kind of girl.

(The entire piece can be seen here!)

Thursday, October 22, 2009

Introduction

Back in art school, I was surrounded by people willing and eager to see my progress and offer feedback.
Now, graduated and 3,000 miles away from my former studios, a responsive audience is much harder to capture. This blog will serve as a tool in that search.
Here you will find contemplations of ideas, progress shots and explanations, glimpses of finished products and links to inspirations. It's a door into my studio, accessible from any distance.
Come on in.