Showing posts with label process. Show all posts
Showing posts with label process. Show all posts
Sunday, September 4, 2011
Friday, June 17, 2011
Wednesday, June 8, 2011
Friday, February 26, 2010
Friday, November 6, 2009
Mocked up images
This past year I've begun to really enjoy quilting. To be more precise, I enjoy piecing. The actual quilting together of layers I'm not yet so keen on, but I do really love the piecing. One type of quilt that has especially caught my attention is the Crazy Quilt, in which there is no discernible repeating, organized pattern, but rather improvised whimsy. I've been bringing this idea of the crazy quilt into some of my recent pieces. I have found, however, that the improvisational quality doesn't work with my tendency for pre-planning my pieces. As such, when approaching this look, I am making not quite what you could call Crazy Quilts, but more Controlled Chaos Quilts. I plan out the entire piece first on paper, which I then cut into pieces that can be puzzled back together when recut in fabric. That's a process explanation for another day, though. Today is about imagery.
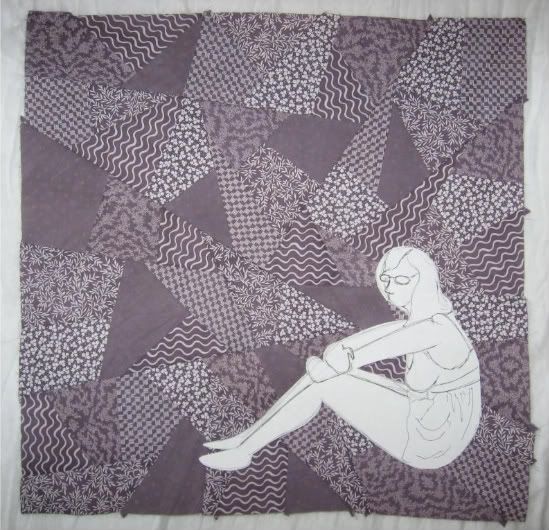
A couple months ago I pieced a few small quilt tops, only about 18" square. I began with 6 white-on-white prints, divided the prints in thirds, then dyed 1/3 a mid tone and 1/3 a dark tone to create, with the white, a transitionary trio. I enjoyed the way that the printed pattern came out or hid more depending on the dyed background cloth, and the way the patterns persisted in their small pieces no matter how I changed the Controlled Chaos pattern. I decided to use an identical self portrait image on all 3, to echo the repeating quality of the patterns. Today I narrowed down my images to 2 choices, slightly different in size, proportion, and shape. I pinned some mocked up paper patterns to the darkest of the quilt tops to get an idea for how the shapes might fit on the cloth.
Choice 1!
Choice 2!
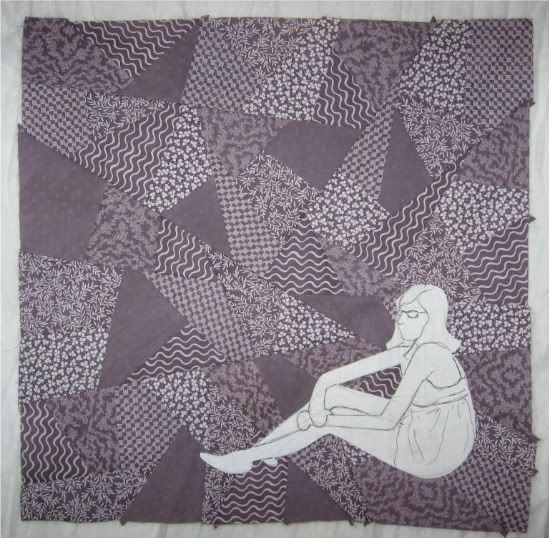
The thread with which I will embroider these images will allow them to fade into the quilt top far more than suggested by the white paper, but for now it's still a useful aid.
I feel as though Choice 1 is perhaps a cleaner image, easier to understand, when subtle, without closely paid attention. I'm not crazy about how it fits on the quilt top, though. I much prefer the way Choice 2 fits, the larger difference between height and width in the character, the way it relates to the shape of the background. I like the way the shorter character allows the quilted patterns to dominate the overall image.
Hopefully I won't stare at these pictures too long before making a decision. Feedback welcome.
A couple months ago I pieced a few small quilt tops, only about 18" square. I began with 6 white-on-white prints, divided the prints in thirds, then dyed 1/3 a mid tone and 1/3 a dark tone to create, with the white, a transitionary trio. I enjoyed the way that the printed pattern came out or hid more depending on the dyed background cloth, and the way the patterns persisted in their small pieces no matter how I changed the Controlled Chaos pattern. I decided to use an identical self portrait image on all 3, to echo the repeating quality of the patterns. Today I narrowed down my images to 2 choices, slightly different in size, proportion, and shape. I pinned some mocked up paper patterns to the darkest of the quilt tops to get an idea for how the shapes might fit on the cloth.
Choice 1!
Choice 2!
The thread with which I will embroider these images will allow them to fade into the quilt top far more than suggested by the white paper, but for now it's still a useful aid.
I feel as though Choice 1 is perhaps a cleaner image, easier to understand, when subtle, without closely paid attention. I'm not crazy about how it fits on the quilt top, though. I much prefer the way Choice 2 fits, the larger difference between height and width in the character, the way it relates to the shape of the background. I like the way the shorter character allows the quilted patterns to dominate the overall image.
Hopefully I won't stare at these pictures too long before making a decision. Feedback welcome.
Saturday, October 24, 2009
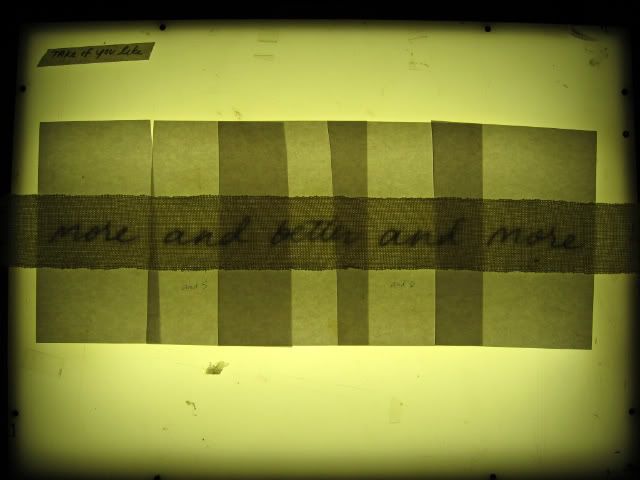
A frequently used process
Much of my work involves embroidered imagery drawn from photography. I thought I'd begin here with a little tour through a process I often use to turn a photograph into an embroidery pattern, using an older piece as a model.
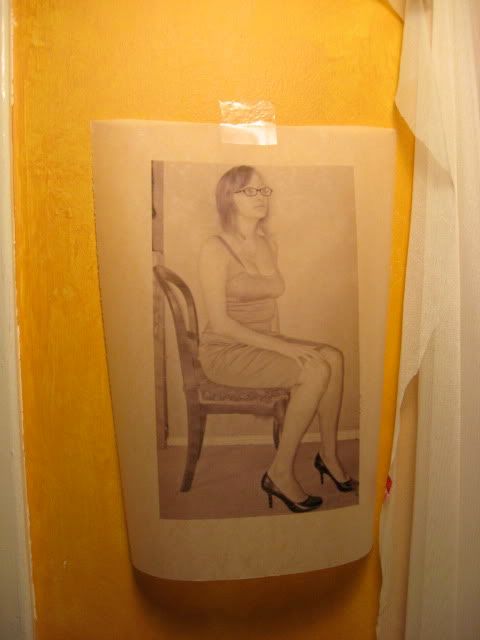
To begin, I select an image in which the subject is clearly visible, such as this one:

I scan the image, resize as needed, adjust brightness and contrast, and print it out in black and white, like so:

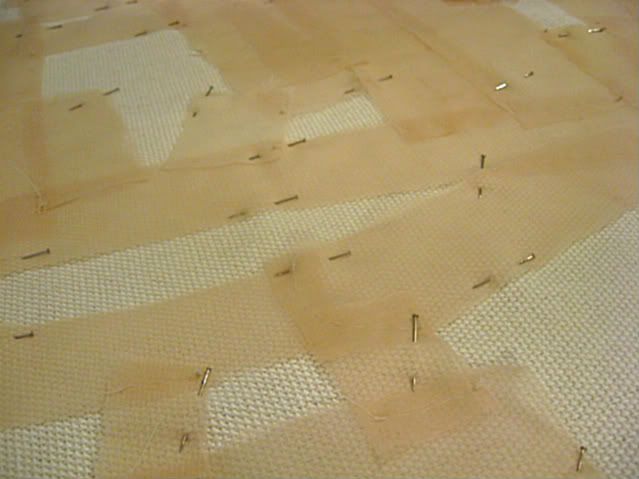
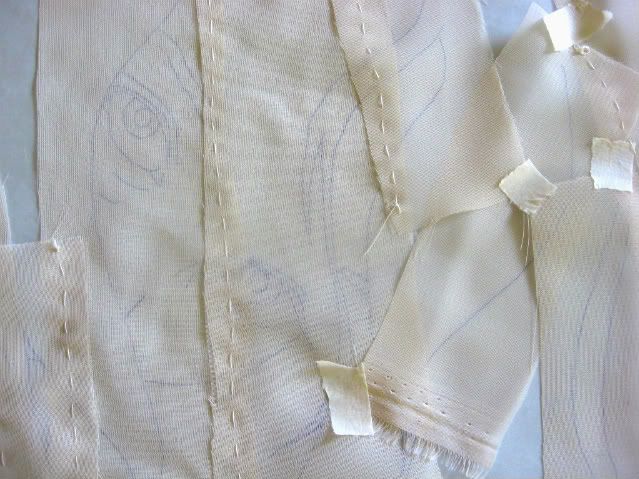
Next I draw over the image, picking out lines and shapes I want to end up in the eventual embroidery pattern:

Once the line drawing is complete, I retrace the image on to the tracing paper I use as my pattern:

And so goes the process:

With the pattern ready, I can adhere it to my chosen cloth and stitch away, perforating the paper with my stitches so that it is easily removed when I am done. This is the finished embroidery of that piece:

It's a bit of a time consuming and labor intensive way to go about turning the image into the pattern, but then, most of my work is time consuming and labor intensive, and I rather enjoy it. I'm a time consuming/labor intensive appreciative kind of girl.
(The entire piece can be seen here!)
To begin, I select an image in which the subject is clearly visible, such as this one:
I scan the image, resize as needed, adjust brightness and contrast, and print it out in black and white, like so:
Next I draw over the image, picking out lines and shapes I want to end up in the eventual embroidery pattern:
Once the line drawing is complete, I retrace the image on to the tracing paper I use as my pattern:
And so goes the process:
With the pattern ready, I can adhere it to my chosen cloth and stitch away, perforating the paper with my stitches so that it is easily removed when I am done. This is the finished embroidery of that piece:
It's a bit of a time consuming and labor intensive way to go about turning the image into the pattern, but then, most of my work is time consuming and labor intensive, and I rather enjoy it. I'm a time consuming/labor intensive appreciative kind of girl.
(The entire piece can be seen here!)
Subscribe to:
Posts (Atom)